Restoring A Vintage Air Pistol Box
The Project
Sometimes we acquire an airgun that includes a vintage box in somewhat fragile condition. Even careful handling of such a box can cause unintentional damage. In general, rare, vintage, or antique airgun items should be left in their original condition if possible. But sometimes restoration is needed to stabilize an item that's in a critical state of deterioration. In such instances reversible stabilization techniques are preferred to permanent alteration.
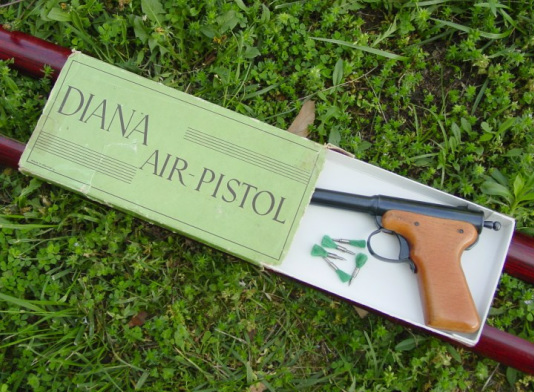
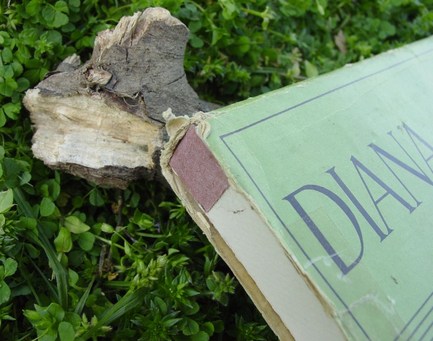
What follows is an account of how I restored the box of a vintage Diana Model 2 air pistol. I'm not a restoration expert so I'm sure that better materials and techniques are available to those in the restoration trade. As acquired the box was torn, taped, flattened, and missing it's end flaps. It was bagged separately from the pistol in order to keep it from falling totally apart. I didn't attempt to remove any of the cellophane tape from the box.
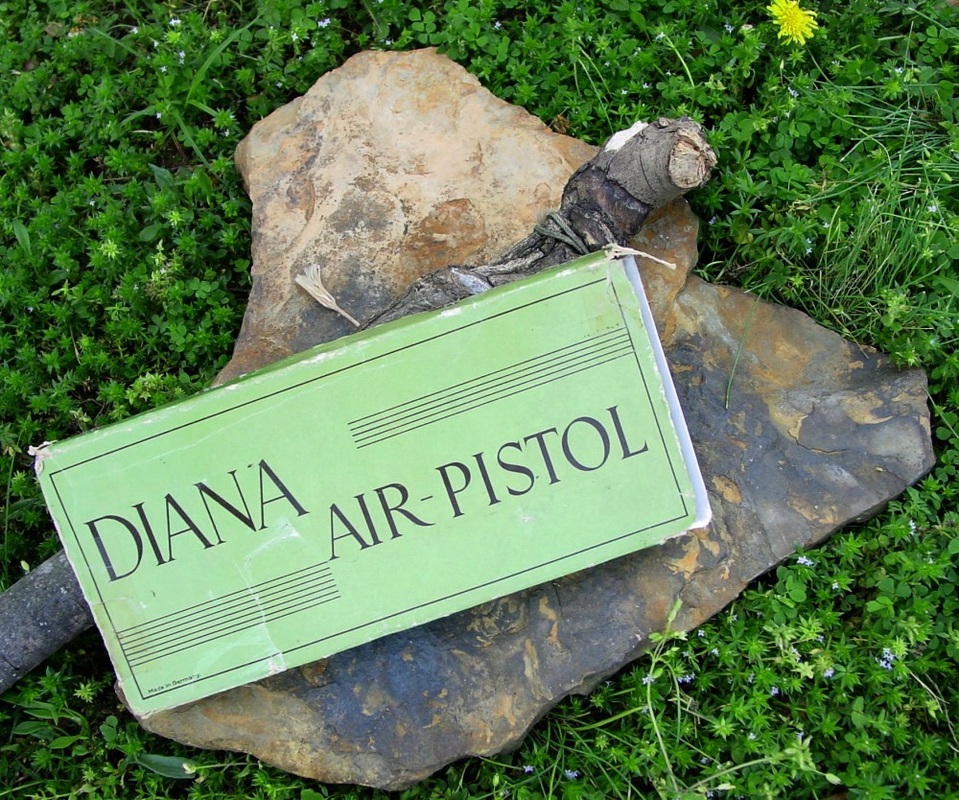
The box apparently had a pair of end flaps that when new made it self supporting. But those flaps were lost through the years allowing the box to split and weaken with time. So I made a tray from cardboard that slides into the box to provide some interior support. The box also had a large tear in it's face and a split along it's seam. To close the tear in the face and the split in the seam l cut patches from a common paper grocery sack and pasted them inside the box using a water soluble glue. As a result of these repairs the box can again be used to store the pistol as it was originally intended.
What follows is an account of how I restored the box of a vintage Diana Model 2 air pistol. I'm not a restoration expert so I'm sure that better materials and techniques are available to those in the restoration trade. As acquired the box was torn, taped, flattened, and missing it's end flaps. It was bagged separately from the pistol in order to keep it from falling totally apart. I didn't attempt to remove any of the cellophane tape from the box.
The box apparently had a pair of end flaps that when new made it self supporting. But those flaps were lost through the years allowing the box to split and weaken with time. So I made a tray from cardboard that slides into the box to provide some interior support. The box also had a large tear in it's face and a split along it's seam. To close the tear in the face and the split in the seam l cut patches from a common paper grocery sack and pasted them inside the box using a water soluble glue. As a result of these repairs the box can again be used to store the pistol as it was originally intended.
Materials & Tools Used
Water soluble glue
Paper grocery sack or a similar thick paper
Artist's mat board - 112# weight
Scissors
Carpet/Utility knife
Pencil
Straight Edge
Ruler
Small clamps or snap style clothes pins
Paper towel and a bowl of water for clean-up
Paper grocery sack or a similar thick paper
Artist's mat board - 112# weight
Scissors
Carpet/Utility knife
Pencil
Straight Edge
Ruler
Small clamps or snap style clothes pins
Paper towel and a bowl of water for clean-up
1) Cut & Pre-Glue The Patch
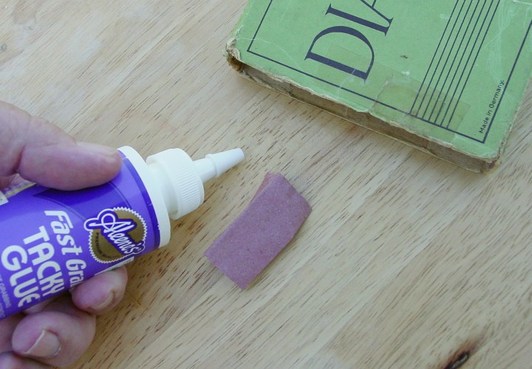
To reinforce a torn face or split seam cut a patch from the thick paper sack material and apply glue to one side of patch. Spread the glue evenly across the surface of the patch.
2) Apply The Pre-Glued Patch
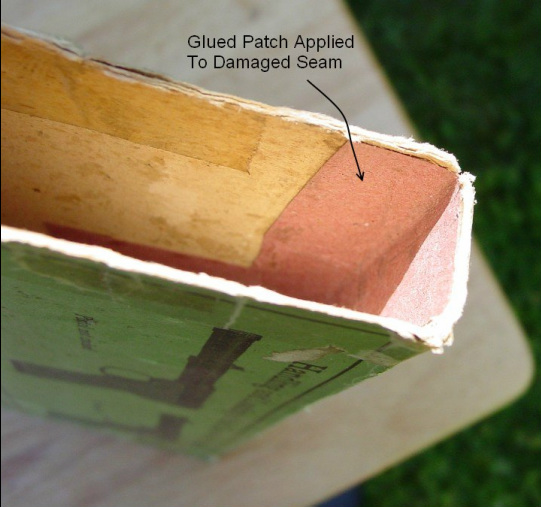
Spread a small amount of glue evenly onto the interior surface of the box where it is damaged. Close the tear/split by pinching it together with your fingertips from outside the box while applying a pre-glued patch to the damaged area inside the box. With the patch pressed into position wipe away any excess glue with a paper towel. Sit the box aside and allow the glue to dry.
3) Making The Cardboard Tray
Measure & record the interior dimensions of the airgun box. Since the tray must slide freely inside the box the width & height measurements of tray must be drawn slightly undersize in reference to the box. Usually 1/16" to 1/8" undersize in the width & height dimensions is sufficient.
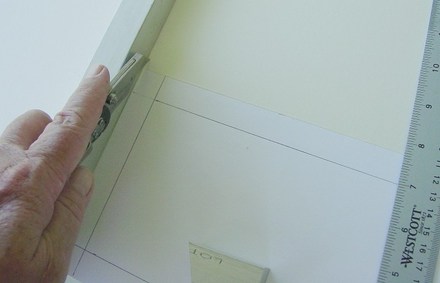
With a pencil draw lines representing the calculated tray dimensions directly onto a piece of artist's mat board or onto a sheet of paper that will be taped to the mat board as a template.
Important - Remember that the exterior border lines will be cut clean through while some interior lines which form the tray will be surface scored only to create the folds .
Using a utility knife & straight edge carefully cut through or surface score the mat board along the drawn lines
4) Crease & Fold The Mat Board
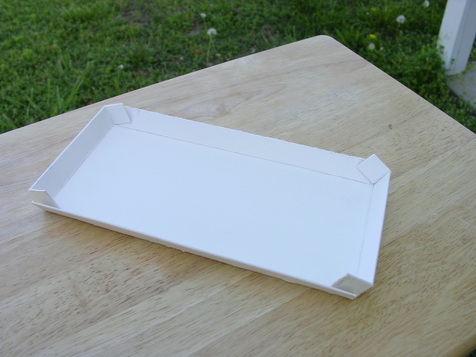
Crease and fold the mat board along the scored dimension lines to form the sides of the tray. The tabs are positioned along the interior walls of the sides of the tray.
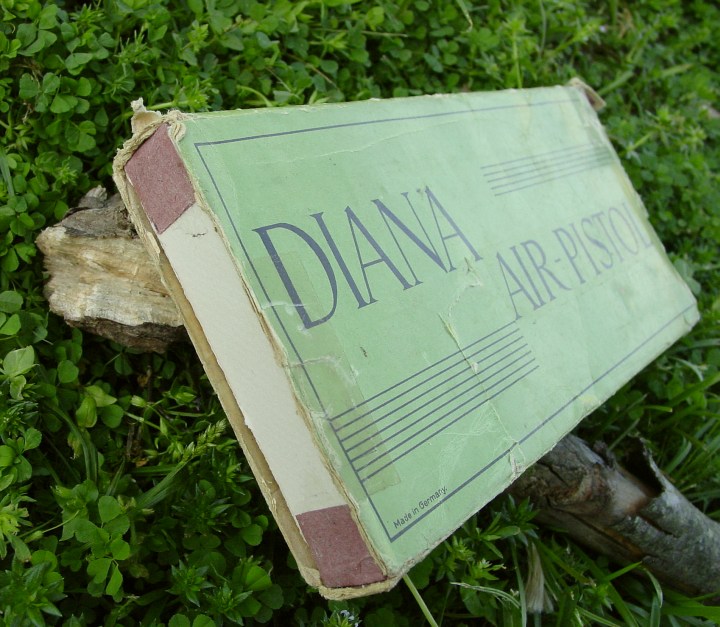
5) Form & Glue The Corners
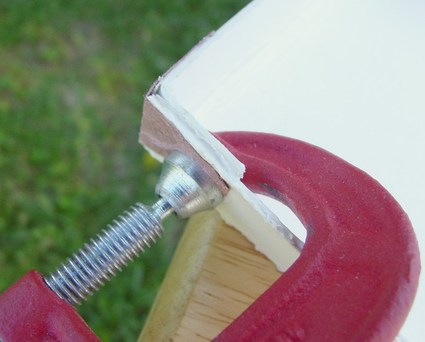
Cut four patches from the thick paper - one for each tray corner. In this instance I allowed the patch to extend 1 - 1/2" along each side of the tray so the total patch length is 3" inches. Apply glue to the exterior surface of the corner tab. Now apply glue evenly to one surface of the patch.. Fold & form the tabs at the corner of the tray. Apply glue evenly to the exterior surfaces of the formed corner. Position the paper patch along the outside surface of the corner so that half the patch's length extends along each side. Compress the patch & glued corner tab with a clamp until the glued corner joint glue has completely dried. Follow the same procedure for the remaining three corners to complete construction of the tray. Allow the glued corners to dry thoroughly before using the tray,
|
|
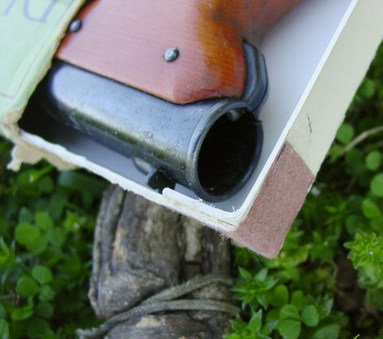
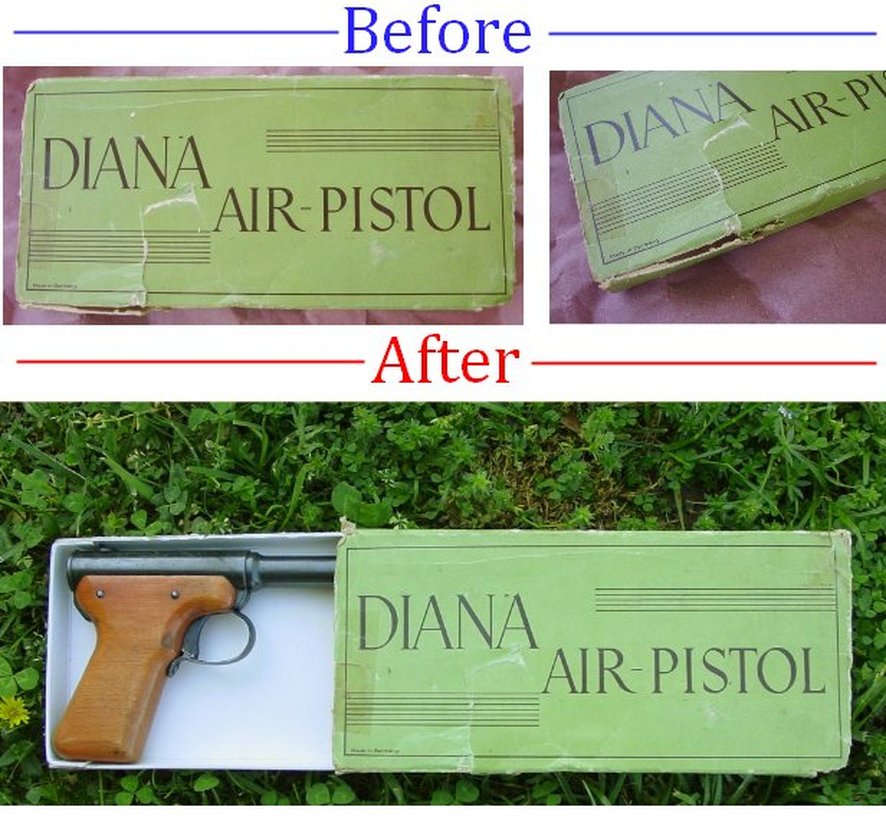
The Finished Box - Before & After
|
|
